It is a great start to 2019. Joris from Microsoft has welcomed the year with the release of the Azure DevOps Release Pipeline task on the marketplace.
Official blog: https://community.dynamics.com/365/financeandoperations/b/newdynamicsax/archive/2019/01/18/first-azure-devops-task-released
I thought I would do a walkthrough for those that haven’t had a chance to play with it yet.
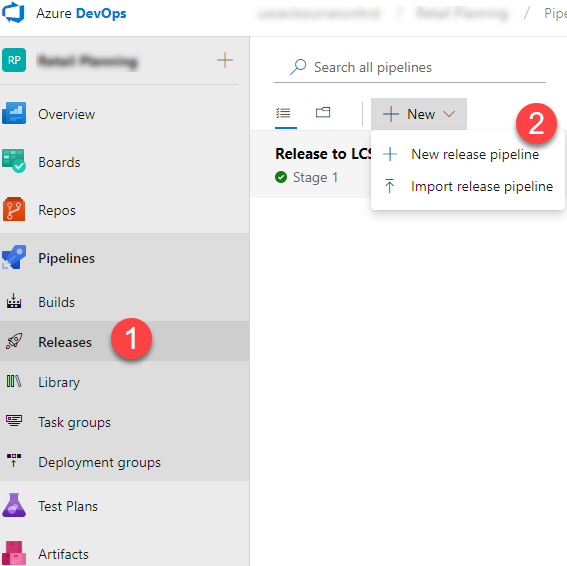
New release pipeline
In Azure DevOps, click on the New release pipeline.
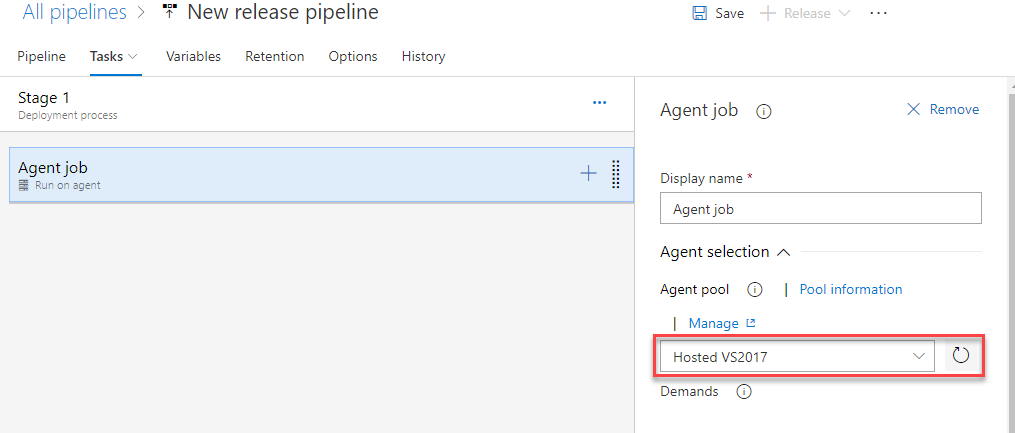
You will get an option to select from a template. Just select “Empty Job”.
In the first stage, make sure the Agent job is using “Hosted VS 2017”.
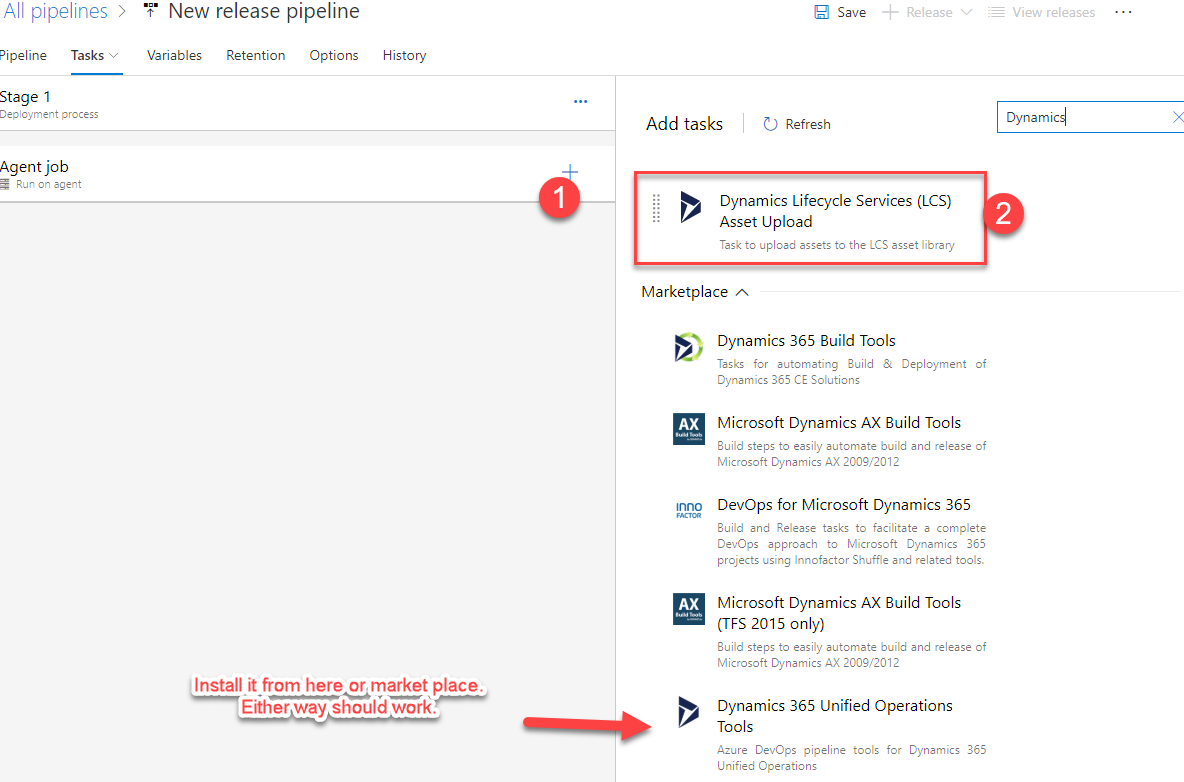
In the Agent job click on the + icon to add a task. Select the LCS Asset Upload task.
If you don’t see, then you have not installed it. Just select the “Dynamics 365 Unified Operations Tools”
link at the bottom. Otherwise, install from here
https://marketplace.visualstudio.com/items?itemName=Dyn365FinOps.dynamics365-finops-tools and follow the guided process.
Stages
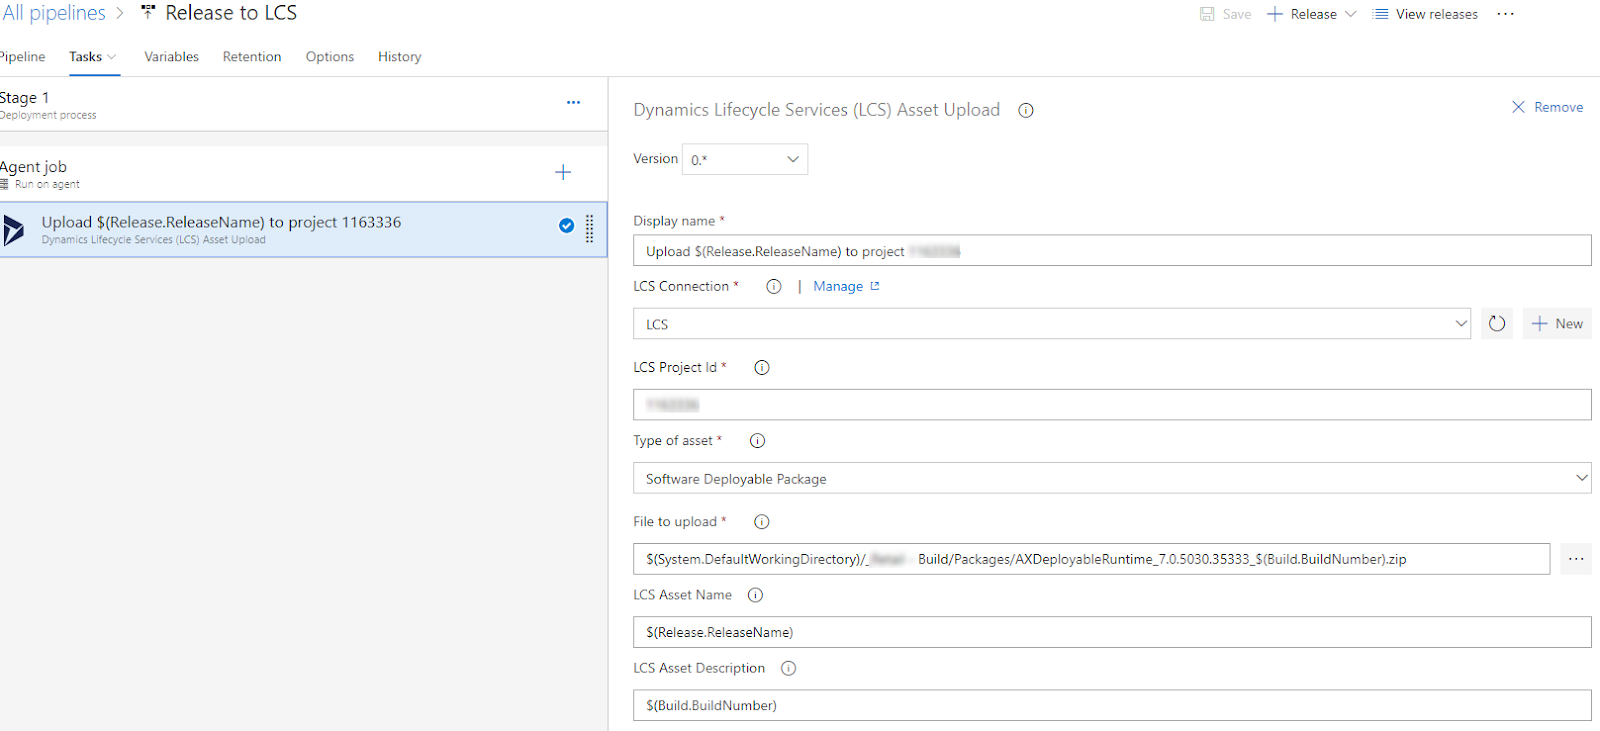
Now that you have the first task added. Fill in the details. You will have to add a
new connection to LCS. I need to investigate the tags to give it a better name and description.
When you click on the new LCS connection, you will get this dialog. Most of it is defaulted for you. Enter the username and password.
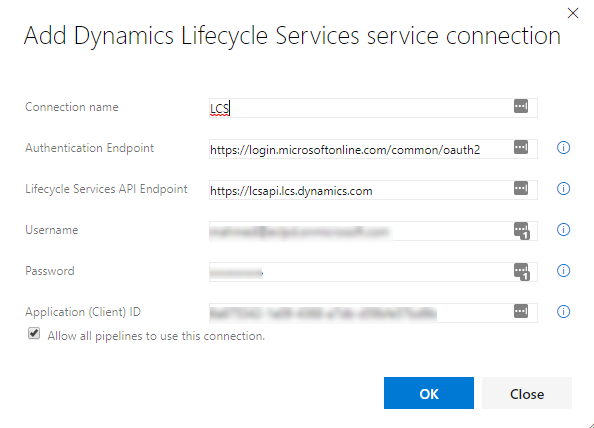
Client ID (Application ID) can be created in Azure Portal.
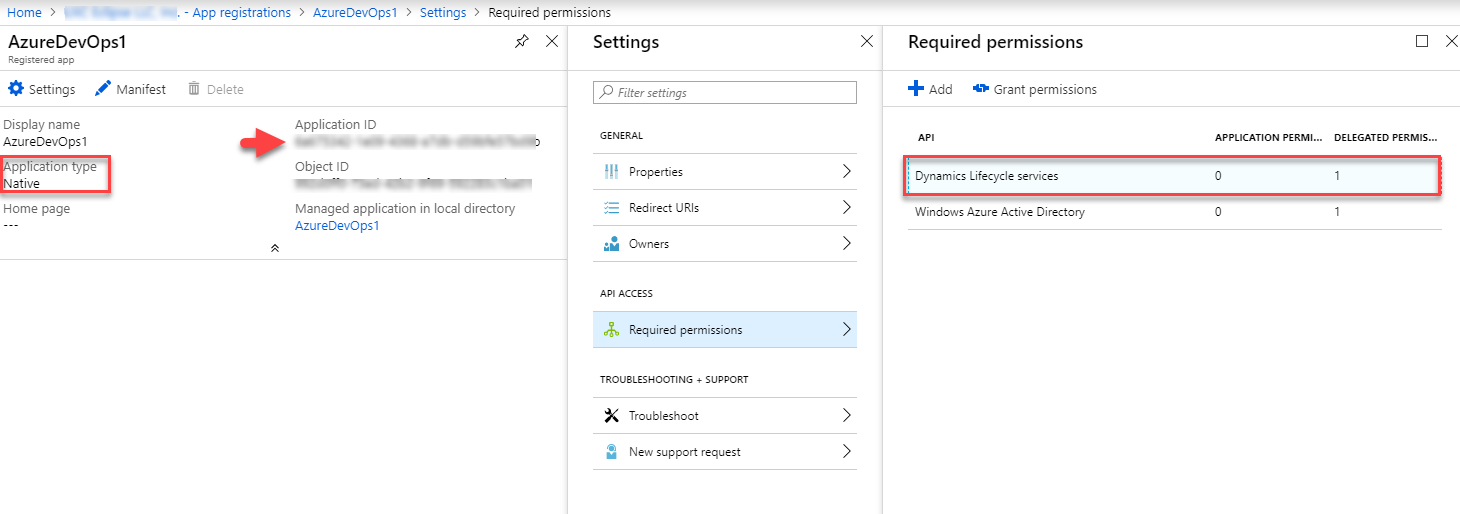
You need permissions to “Dynamics Lifecycle services”. Make sure it is a
Native application type. Hopefully it looks like the screenshot below.
Don’t forget to click on “Grant permissions”.
Artifact
Next, we go back to the main Pipeline screen and select our artifact.
Click on the Add an artifact tile. Select build and fill in the details.
What we want to do in this scenario is release the latest build.

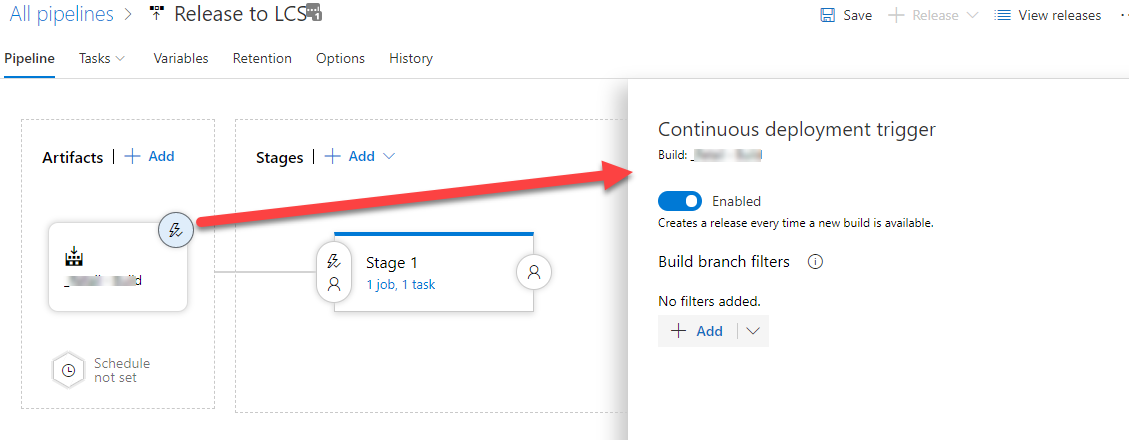
Trigger
To set up a trigger to occur on a build. Click on the lightning icon. You can enter
filters to ensure only your release branch gets uploaded to LCS.
Run
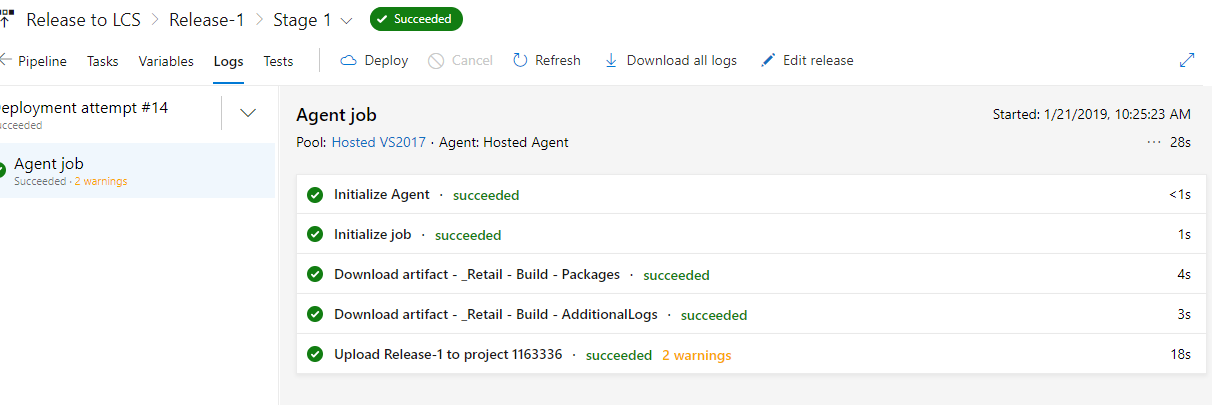
You can run it manually to test it out. Click on the Create a release.

A successful run should look like this.
LCS
It is pretty satisfying to see the result on LCS.
