Recently, Microsoft released their eCommerce solution. I got started by looking at how to do a bit of development locally. The guide is here https://docs.microsoft.com/en-us/dynamics365/commerce/e-commerce-extensibility/setup-dev-environment
One of the first steps to development is to clone Microsoft github repo. That's fairly easy to do.
But, the next question I had was, “how do I do my development in my own private version control and continue to pull Microsoft's latest releases?”. I don't want to manually merge folders and deal with painful files.
I am not an expert in git and still have a lot to learn. However, below is the approach we have taken and will test out over the coming weeks to see how it works for us.
Go to Azure DevOps (my choice of version control) and Import the repository.
Click on Import repository.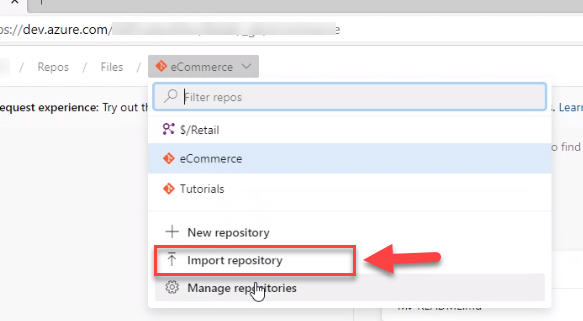
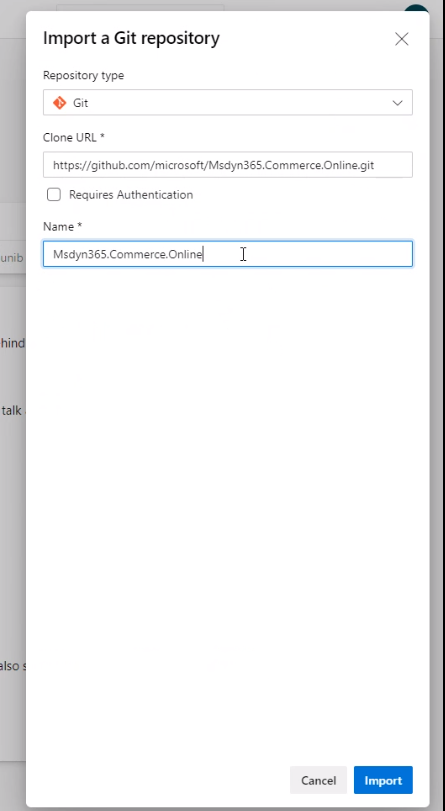
Give it the github URL and name.
One of the first steps to development is to clone Microsoft github repo. That's fairly easy to do.
But, the next question I had was, “how do I do my development in my own private version control and continue to pull Microsoft's latest releases?”. I don't want to manually merge folders and deal with painful files.
I am not an expert in git and still have a lot to learn. However, below is the approach we have taken and will test out over the coming weeks to see how it works for us.
Go to Azure DevOps (my choice of version control) and Import the repository.
Click on Import repository.
Give it the github URL and name.
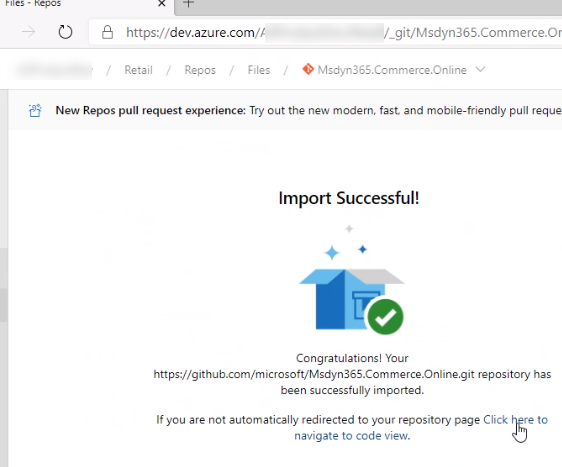
After a minute it should show an Import Successful message.
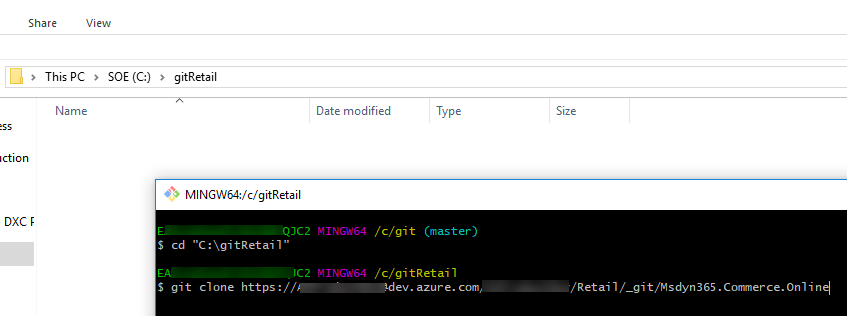
Using git bash, clone your Azure DevOps repo by the following commands. I used a clean folder called gitRetail.
cd “c:/gitRetail”
git clone git clone https://MyProject@dev.azure.com/MyProject/_git/Msdyn365.Commerce.Online
 Then you can add a remote connection to the original github by the following command.
cd “c:/gitRetail/ Msdyn365.Commerce.Online”
git remote add Microsoft https://github.com/microsoft/Msdyn365.Commerce.Online.git
Now you can fetch/merge or pull from the Microsoft master branch.
By doing a git fetch
E.g.
git fetch Microsoft master
git pull Microsoft master
git remote
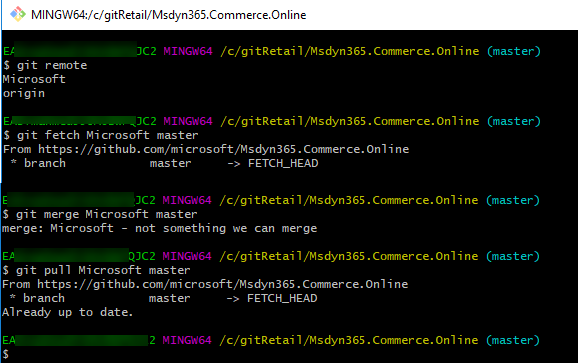
Below are some screenshots.
Useful links:
https://docs.microsoft.com/en-us/azure/devops/repos/git/import-git-repository?view=azure-devops
https://www.atlassian.com/git/tutorials/syncing/git-pull
Thanks to my colleague and friend Pontus for helping out and always giving advice on git.
Using git bash, clone your Azure DevOps repo by the following commands. I used a clean folder called gitRetail.
cd “c:/gitRetail”
git clone git clone https://MyProject@dev.azure.com/MyProject/_git/Msdyn365.Commerce.Online
Then you can add a remote connection to the original github by the following command. cd “c:/gitRetail/ Msdyn365.Commerce.Online”
git remote add Microsoft https://github.com/microsoft/Msdyn365.Commerce.Online.git
Now you can fetch/merge or pull from the Microsoft master branch.
By doing a git fetch
E.g.
git fetch Microsoft master
git pull Microsoft master
git remote
Below are some screenshots.
Useful links:
https://docs.microsoft.com/en-us/azure/devops/repos/git/import-git-repository?view=azure-devops
https://www.atlassian.com/git/tutorials/syncing/git-pull
Thanks to my colleague and friend Pontus for helping out and always giving advice on git.