
Data Management Export - XML to JSON Transformation

In my last post, I wrote about event based integration using Business Events. I used JSON as my export file type. JSON is a lot easier to work with in Microsoft Flow or Azure LogicApp.
Below is how I achieved it.

Data Management framework doesn’t do JSON by default. However, it does do XML file format.
A bit of googling and trial and error. I found this XSLT code that transformed XML to JSON.
https://gist.github.com/bojanbjelic/1632534
Here is the authors blog post to give credit.
https://www.bjelic.net/2012/08/01/coding/convert-xml-to-json-using-xslt/#code

Setup

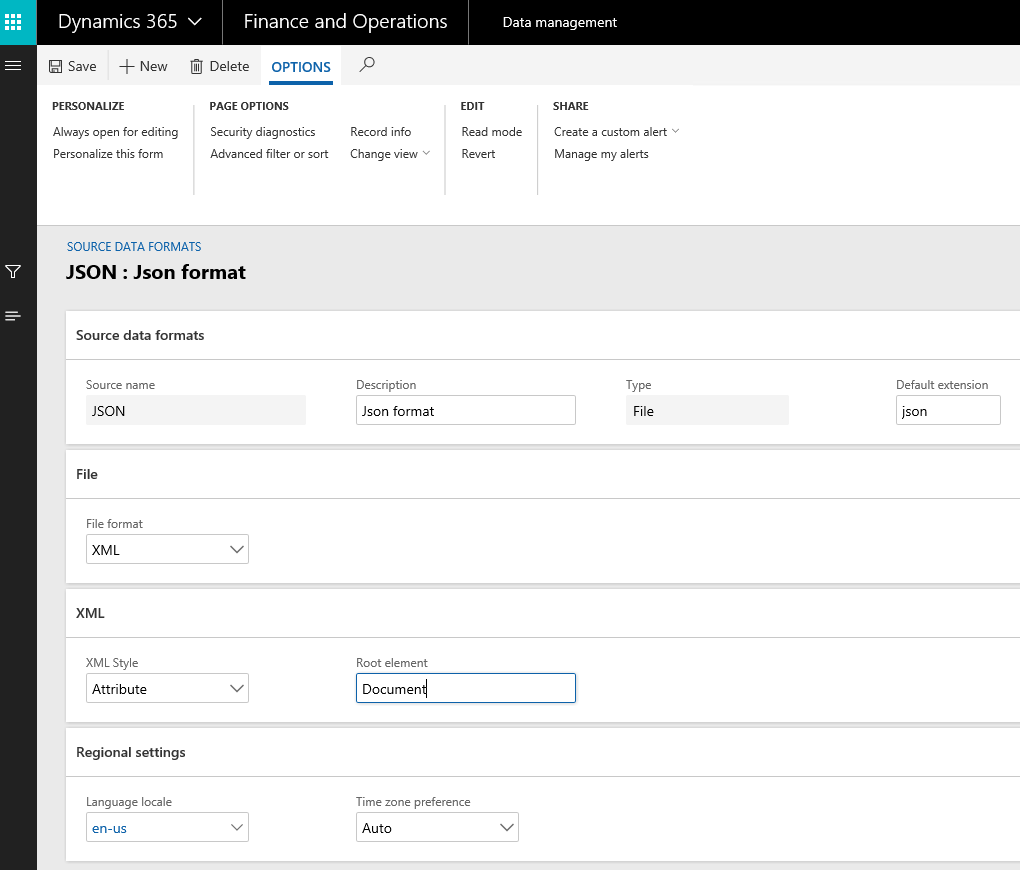
Under the Data management workspace, open the Source data format form. Create new record called JSON and set the default extension to json.
  • File format = XML
  • XML Style = Attribute
  • Root element = Document (I left this as default)


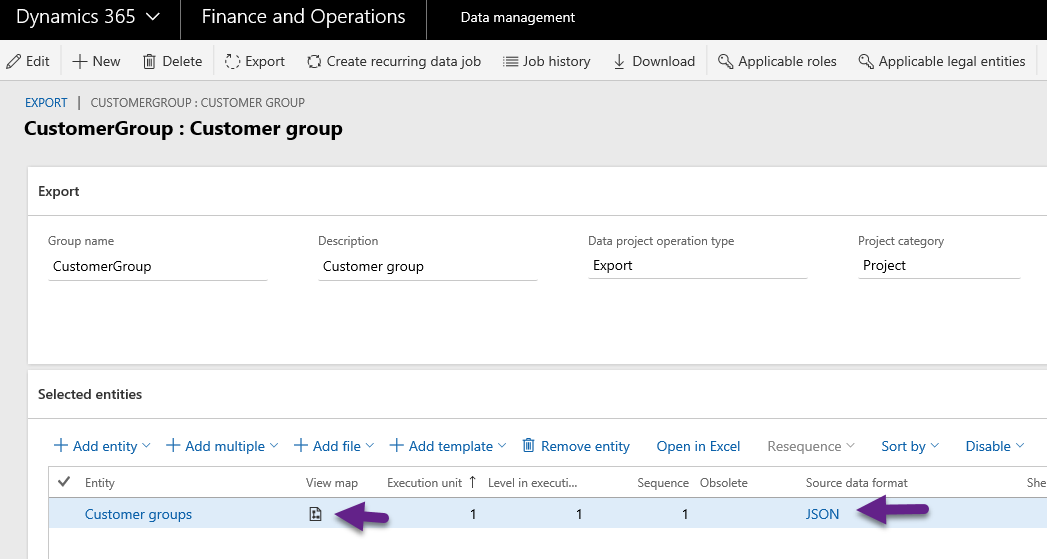
Create a new Export and select your entity. In the Source data format, select JSON record that was created in the previous step.

Now click on the View map icon.


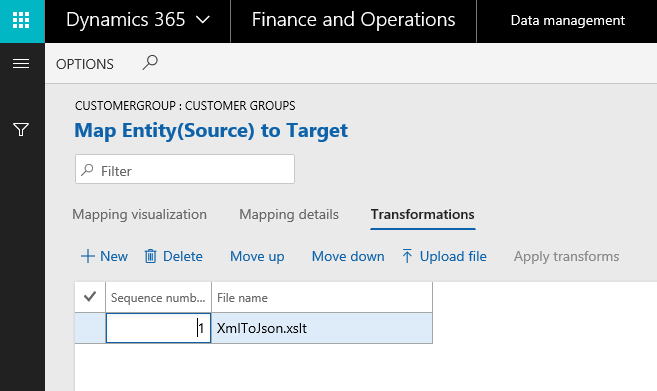
In the mapping form, click on the Transformations tab. Then upload the xslt file you downloaded from the github.


That's it for the set up. Now to run it.

Process

Normally when you export and XML file. It looks like this:

Once the transformation is applied, you get a JSON file like this.


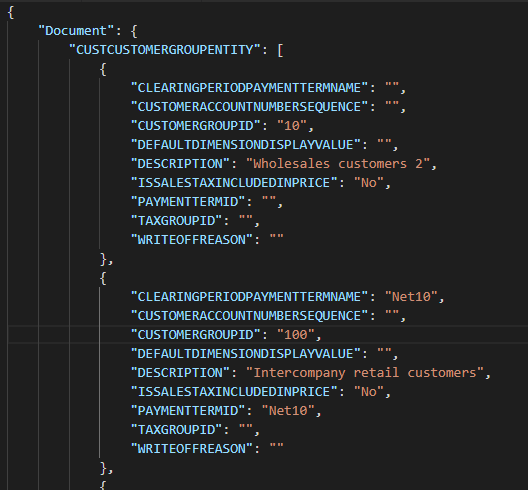
This is great because I like to use Microsoft Flow or LogicApps to read the files to process. With XML you have to use XPATH or figure out otherwise to read it.

This works very nicely and no development or extra transformation at the target.

Popular posts from this blog

AX - How to use Map and MapEnumerator

Similar to Set class, Map class allows you to associate one value (the key) with another value. Both the key and value can be any valid X++ type, including objects. The types of the key and the value are specified in the declaration of the map. The way in which maps are implemented means that access to the values is very fast. Below is a sample code that sets and retrieves values from a map. static void checkItemNameAliasDuplicate(Args _args) { inventTable inventTable; Map map; MapEnumerator mapEnumerator; NameAlias nameAlias; int counter = 0; ; map = new Map(Types::String, Types::Integer); //store into map while select inventTable { nameAlias = inventTable.NameAlias; if (!map.exists(nameAlias)) { map.insert(nameAlias, 1); } else { map.insert(nameAlias, map.lookup(nameAlias) + 1); } } //retrieve fro

AX - How to use Set and SetEnumerator

The Set class is used for the storage and retrieval of data from a collection in which the values of the elements contained are unique and serve as the key values according to which the data is automatically ordered. You can create a set of primitive data types or complex data types such as a Class, Record or Container. Below is sample of a set of records. static void _Set(Args _args) {     CustTable       custTable;     Set             set = new Set(Types::Record);     SetEnumerator   setEnumerator;     ;     while select custTable     {         if (custTable && !set.in(custTable))         {             set.add(custTable);         }     }     if (!set.empty())     {         setEnumerator = set.getEnumerator();         setEnumerator.reset();         while (setEnumerator.moveNext())         {             custTable = setEnumerator.current();             info(strfmt("Customer: %1",custTable.AccountNum));         }     } } Common mistake when creating a set of recIds

Approve Workflow via email using template placeholders #Dyn365FO

Dynamics 365 for Finance and Operations has placeholders which can be inserted into the instructions. Normally you would want this to show up in the email that is sent. One of the most useful ones is the URL link to the exact record that you are approving. In the workflow configurations use the placeholder and build up your message. Towards the end it has workflow specific ones. The URL token is %Workflow.Link to web% . For the technical people the token is replaced in this class WorkflowDocumentField. This is what I inserted into my email template. <BODY> subject: %subject% <BR> message: %message% <BR> company: %company% <BR> for: %for% <BR> </BODY> Should look like this. The final result looks like this. If you debug these are the place holders that are put together.