I have been working with the new Business Events feature released in FinOps and you should read the docs site first.
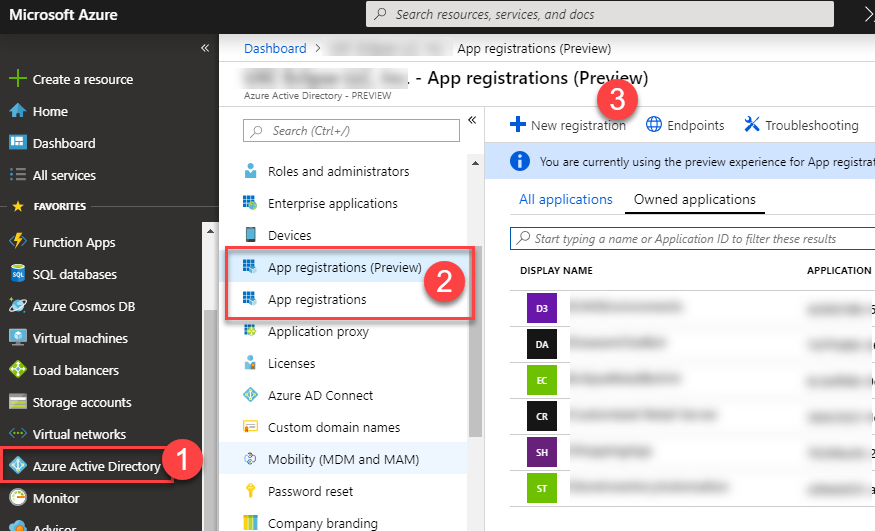
Create a new Web app/API registration and give it a name. It doesn’t really matter in our case what the sign-on url is.

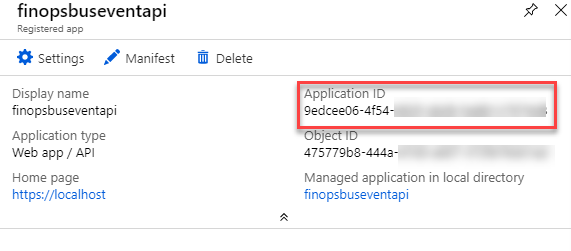
Take note of the Application ID as you will need it later for setting up the Business Event.
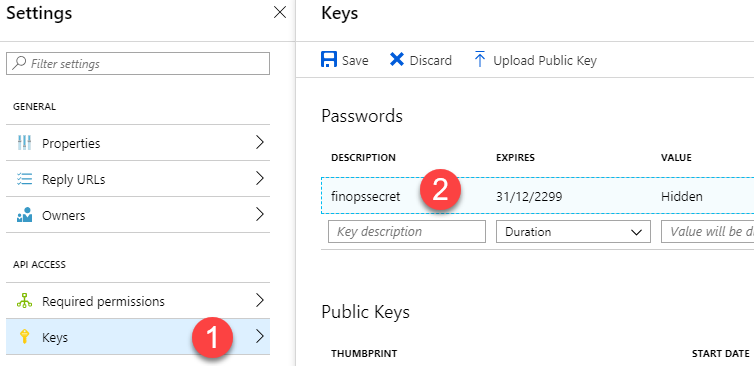
Under the Keys menu, create a new secret key. Copy the value and keep it as you will need it later.
Once the setup is done, just click on Required permissions and Grant permissions button. This has to be done by an administrator. If you don’t Grant permission. You might get an error like “Invalid client secret is provided.”.

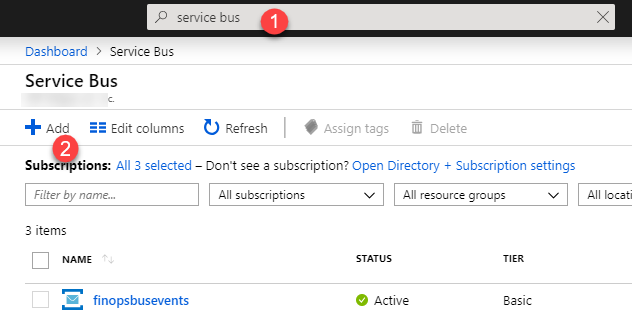
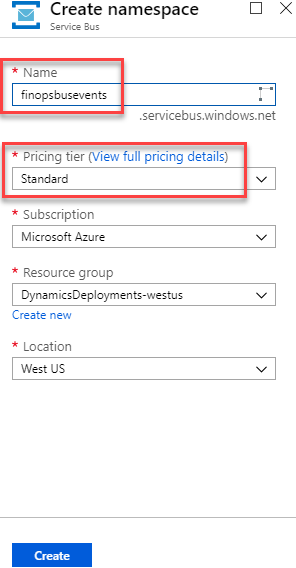
On the create menu, give it a name and select a pricing tier. Take note of both as they will be required later.
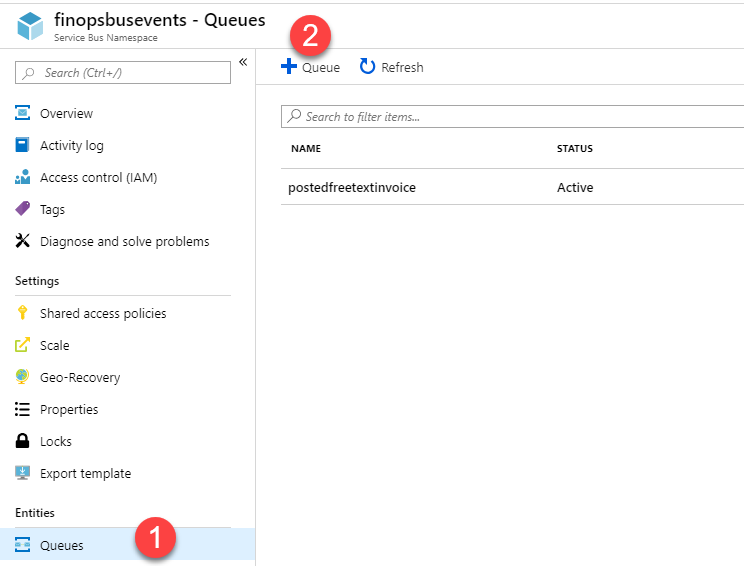
Once it is created, click on the Queues to create a new queue.
Give it a name and click Create. Take note of the name as it will be required later.

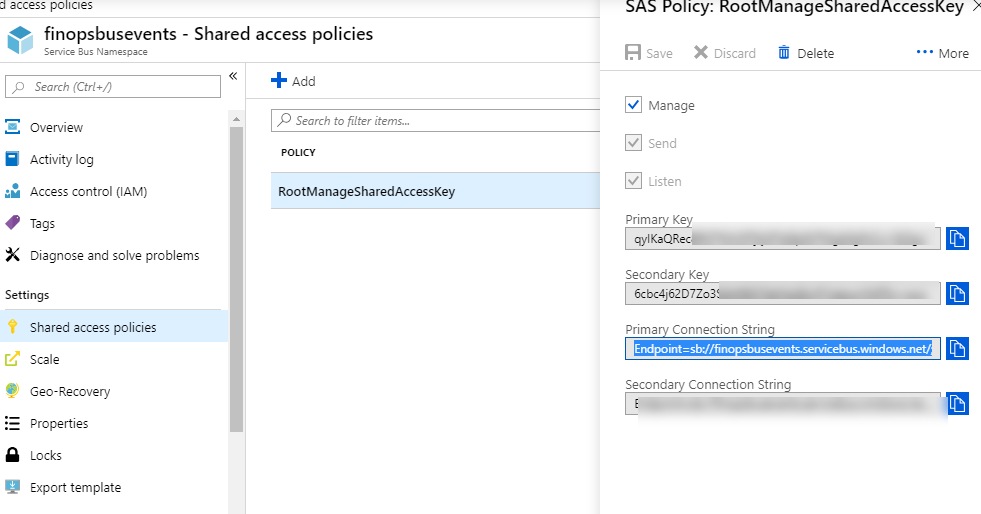
Next, we need to get the connection string. This is required when setting up business events in FinOps. Click on Shared access policies and then select the RootManagedSharedAccessKey. Copy the primary connection string.
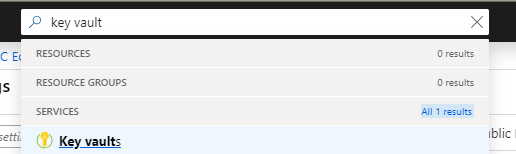
I usually use the search bar on the Azure Portal to find the key vaults menu.
This blog post focuses primarily on setting up Azure Service Bus endpoint. Setting up the Azure services can be tricky if you are not familiar with Azure Key Vault and application registrations.
I have sequenced the post so that you don't have to jump around. There are four key elements to this:
- Create the app registration
- Create the service bus
- Create the key vault secret
- Configure FinOps
Create an App Registration
In the Azure Portal, navigate to the Azure Active Directory menu. Click on App registrations (there is the old one and the preview menu - they are the same but the UI is a bit different). I will show the original App registrations way.Create a new Web app/API registration and give it a name. It doesn’t really matter in our case what the sign-on url is.
Take note of the Application ID as you will need it later for setting up the Business Event.
Under the Keys menu, create a new secret key. Copy the value and keep it as you will need it later.
Once the setup is done, just click on Required permissions and Grant permissions button. This has to be done by an administrator. If you don’t Grant permission. You might get an error like “Invalid client secret is provided.”.
Create a service bus
Search for service bus in the search bar. Then create a new service bus.On the create menu, give it a name and select a pricing tier. Take note of both as they will be required later.
Once it is created, click on the Queues to create a new queue.
Give it a name and click Create. Take note of the name as it will be required later.
Next, we need to get the connection string. This is required when setting up business events in FinOps. Click on Shared access policies and then select the RootManagedSharedAccessKey. Copy the primary connection string.
Create key vault secret
Now to create the key vault secret. Key vault will hold our connection string to the Azure service bus.I usually use the search bar on the Azure Portal to find the key vaults menu.
Create a new key vault and give it a name.

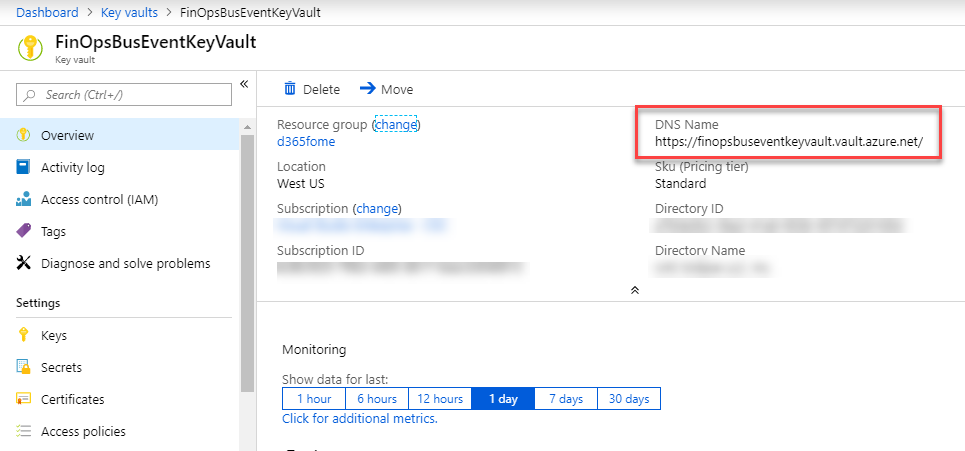
Once it is created, take note of the DNS name. We will need it later.
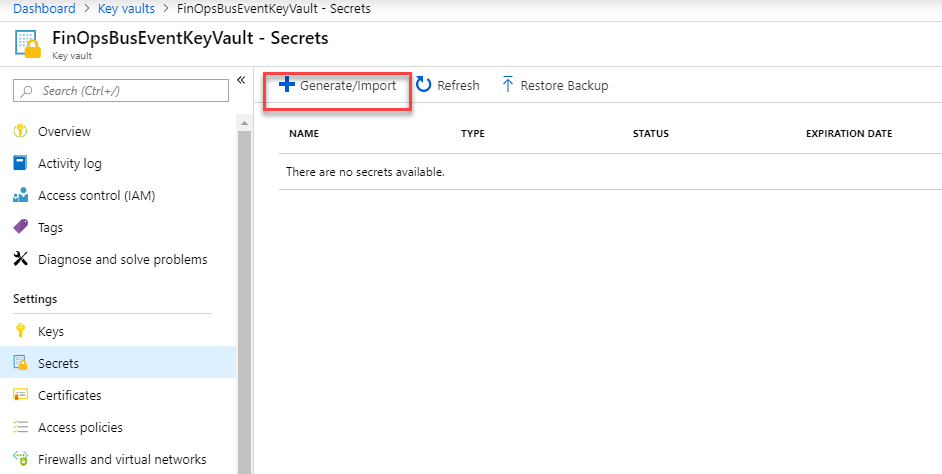
Under the Secrets menu, click on “Generate/Import”.
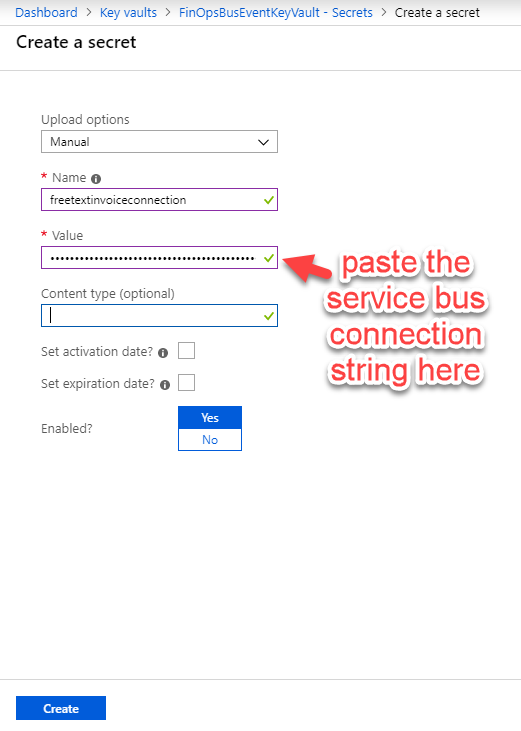
Give it a name and paste the connection string to the Azure Service bus. Take note of the name you entered. You will need it later in FinOps.
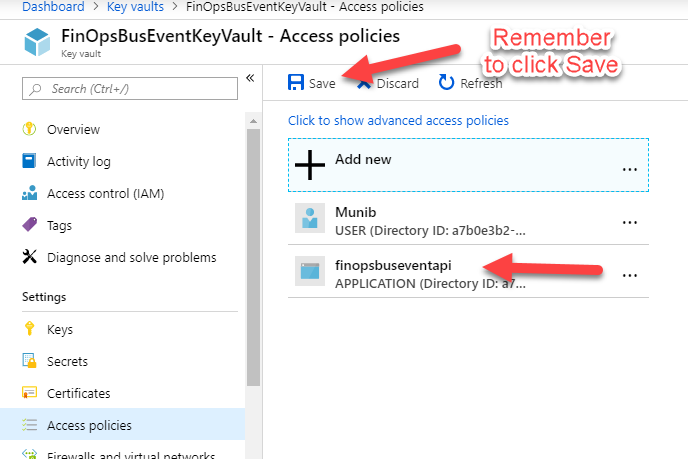
Give the application registration access to the key vault. Under the key vault > Access policies. Click on Add new.

Select the template “Key, Secret & Certificate Management”.
Click on “Select principal” and search for the application registration we created earlier and select.

You will have something like this. Just click on the save button.
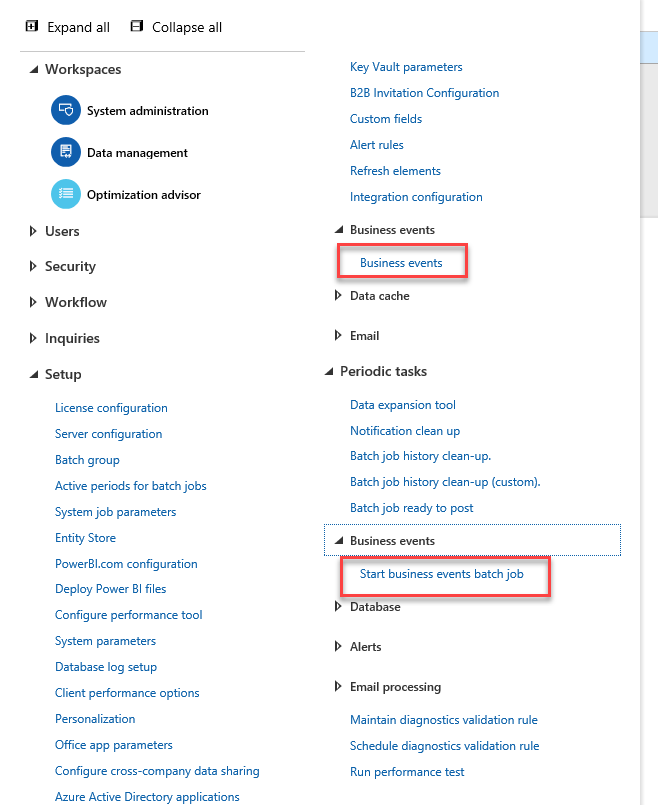
When the form opens, click on Endpoints to create a new endpoint. Select Azure Service Bus Queue as the endpoint type and give it a name. This is where all those important strings you copied earlier are important.

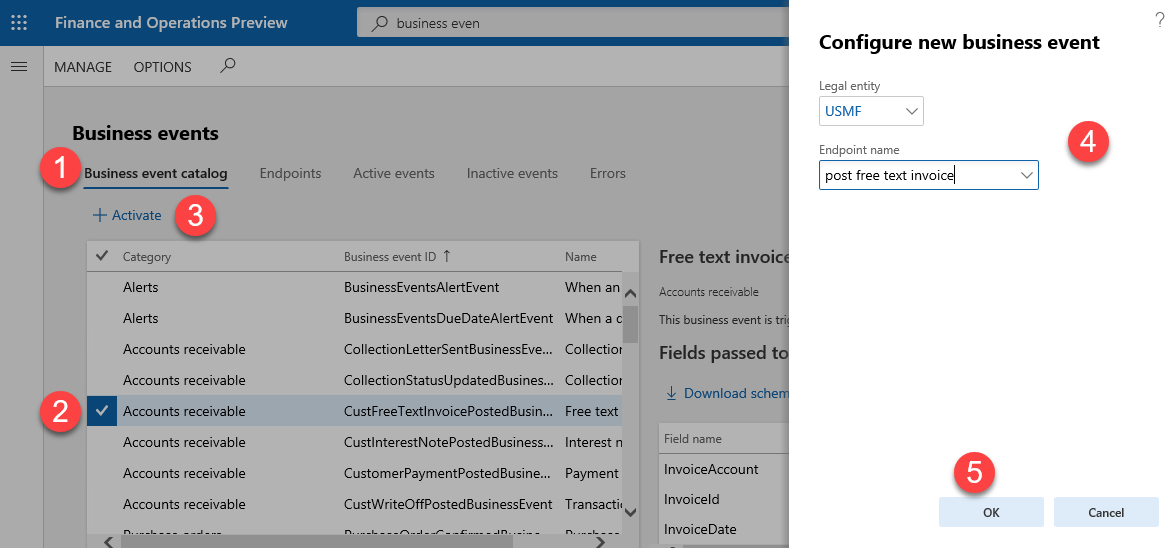
Now that the end point is created, we will activate a business event against it. Click on Business event catalog and select the event. In my case, I selected the Free text invoice posted event.
The Activate menu, will let you select a company and the endpoint we created above.
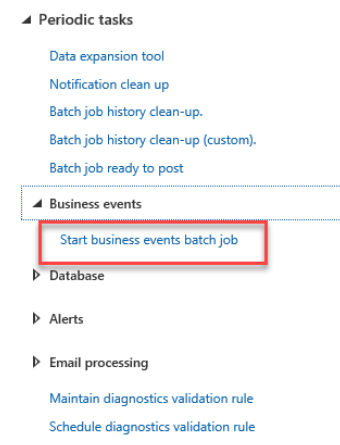
Click on the Start business events batch job
You have to schedule it as a batch job, don’t just run it. Without this nothing will be sent to the business events end point.

Once it is created, take note of the DNS name. We will need it later.
Under the Secrets menu, click on “Generate/Import”.
Give it a name and paste the connection string to the Azure Service bus. Take note of the name you entered. You will need it later in FinOps.
Give the application registration access to the key vault. Under the key vault > Access policies. Click on Add new.
Select the template “Key, Secret & Certificate Management”.
Click on “Select principal” and search for the application registration we created earlier and select.
You will have something like this. Just click on the save button.
Configure FinOps
The Business events menu has now moved to the System administration menu. Open up the business events form and start your set up.
When the form opens, click on Endpoints to create a new endpoint. Select Azure Service Bus Queue as the endpoint type and give it a name. This is where all those important strings you copied earlier are important.
- Queue name - the Azure Service bus queue name you gave it
- Service Bus SKU - the Azure Service bus pricing tier
- Azure Active Directory application ID - this is the Application ID under the Application registration properties
- Azure application secret - Under the application registration there was a secret key that was generate
- Key Vault DNS name - Under the Key vault there was a property DNS name
- Key Vault secret name - the name you gave the secret
Now that the end point is created, we will activate a business event against it. Click on Business event catalog and select the event. In my case, I selected the Free text invoice posted event.
The Activate menu, will let you select a company and the endpoint we created above.
Schedule the business events batch job
Under the system administration > Periodic tasks > Business eventsClick on the Start business events batch job
You have to schedule it as a batch job, don’t just run it. Without this nothing will be sent to the business events end point.
Create a free text invoice and post it
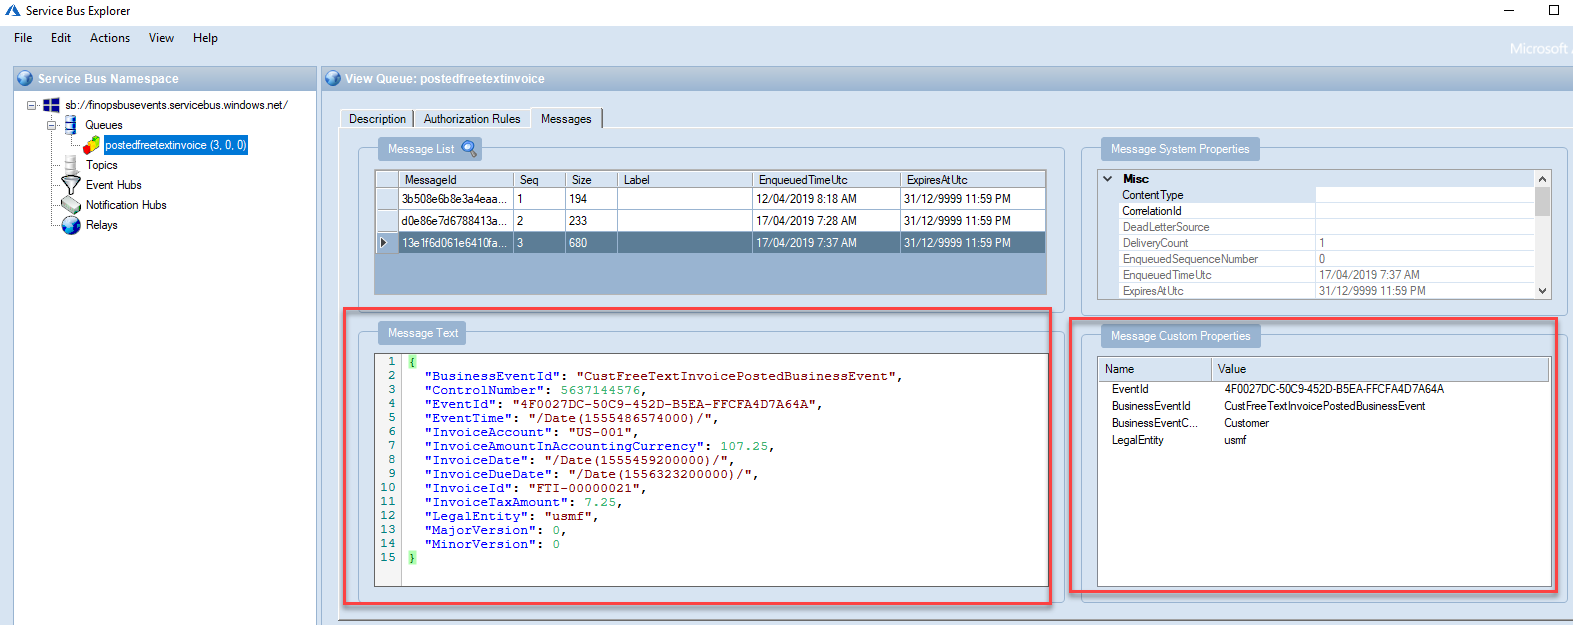
I am not going to write anything here. You can figure this one out.Result of the service bus queue
Using Service Bus Explorer we can see the message.What happens in the back end.
If you want to know what happens in the back end. Business events essentially creates a record in the BUSINESSEVENTSCOMMITLOG table. This will get deleted once the batch job picks it up and sends the event to the selected endpoint.