In this post I will share how I used Business Events for integration.
If you have been in the FinOps space, then you know that there is a Recurring integration pattern that uses dequeue concept. The dequeue pattern, requires that you constantly poll the FinOps URL to see if there is a file you can download.
https://{base URL}/api/connector/dequeue/{activityID}
Then you have to acknowledge the dequeue by calling a second URL
https://{base URL}/api/connector/ack/{activityID}
Another alternative is to use the Package export method. The advantage of this one is that the external system is doing the polling and executes the export job on request. No need for the FinOps batch job to run.
In summary:
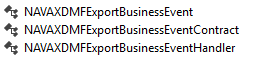
I have developed a business event and is available on GitHub. It contains 3 classes as with any business event. Just add that to your model and build.
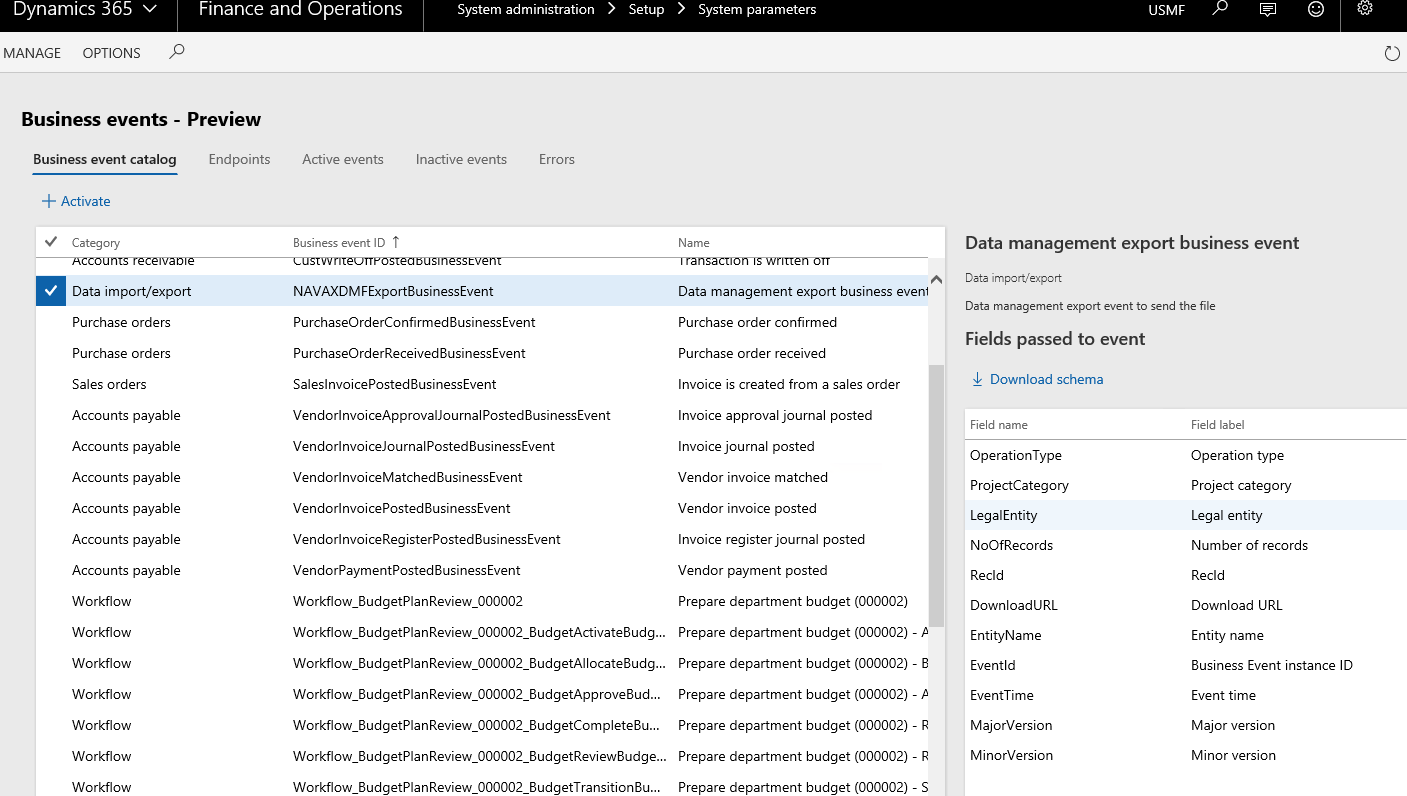
Once you installed the GitHub code. You should see the Data export business event.
If you have been in the FinOps space, then you know that there is a Recurring integration pattern that uses dequeue concept. The dequeue pattern, requires that you constantly poll the FinOps URL to see if there is a file you can download.
https://{base URL}/api/connector/dequeue/{activityID}
Then you have to acknowledge the dequeue by calling a second URL
https://{base URL}/api/connector/ack/{activityID}
Another alternative is to use the Package export method. The advantage of this one is that the external system is doing the polling and executes the export job on request. No need for the FinOps batch job to run.
In summary:
- Both methods use a polling architecture.
- Both methods produce a zip file which you have to extract
- Both methods require that you make a second call to check the status or acknowledge the download
I have developed a business event and is available on GitHub. It contains 3 classes as with any business event. Just add that to your model and build.
Once you installed the GitHub code. You should see the Data export business event.
How it works:
Create an export in the Data management workspace with the following:

Just schedule your export to run on a regular basis with as an incremental export.
The export will generate a payload that looks like this.
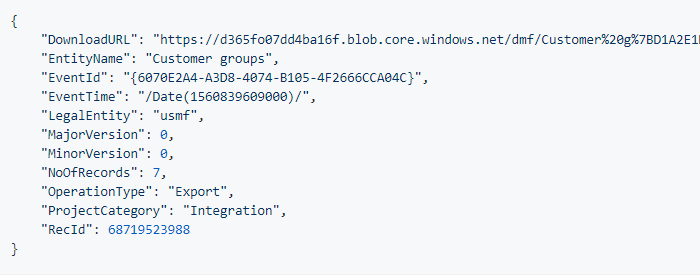
The main fields you need are the DownloadURL and the EntityName. The downloadURL is formed when the event fires. By default it is valid for 1 hour. Think about it when using it in production.
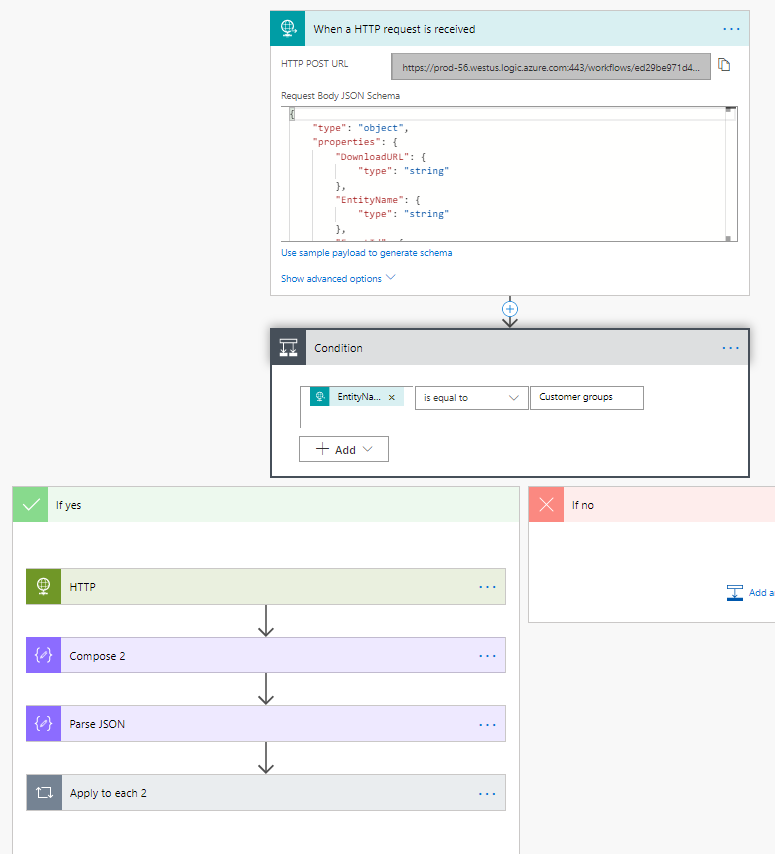
Below is how I am using it in Flow.
The Business Event fires to Flow. I read the JSON payload and check on the EntityName is equal to “Customer groups”. Then I use an HTTP request with the DownloadURL to get the file.
You might be wondering how I parse a JSON file using the DownloadURL. :-) You will have to wait till next blog post.
- Data project operation type = Export
- Project category = Integration
Just schedule your export to run on a regular basis with as an incremental export.
The export will generate a payload that looks like this.
The main fields you need are the DownloadURL and the EntityName. The downloadURL is formed when the event fires. By default it is valid for 1 hour. Think about it when using it in production.
Below is how I am using it in Flow.
The Business Event fires to Flow. I read the JSON payload and check on the EntityName is equal to “Customer groups”. Then I use an HTTP request with the DownloadURL to get the file.
You might be wondering how I parse a JSON file using the DownloadURL. :-) You will have to wait till next blog post.