Microsoft recently released the new Invoice Capture for Dynamics 365 Finance. I ran through installing and configuring it.
From that experience, below is my brain dump and hopefully it can help with things that are not so obvious.
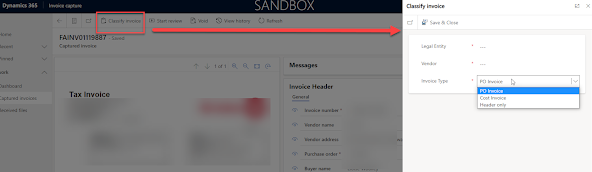
Three type of invoice captures
There are three invoice type paths that can be captured. These drive the screen layout and what kind of information is mandatory.
- PO invoice
- Header-only
- Cost invoice
When an invoice comes in, you can select one of the three invoice types.
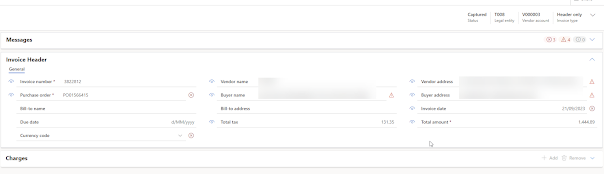
Below are the three screen layouts and differences.
PO invoice – Invoices of this type are associated with purchase orders. The purchase order details must be determined on each invoice line. Both the header and the lines must be reviewed in Invoice capture. This will create a pending vendor invoice.

Header-only – Invoices of this type are associated with purchase orders. The purchase order field on the invoice header is a mandatory field. If the Automatically create invoice lines feature is enabled, the invoice lines are automatically created from the purchase order in Finance, and users don't have to review the line details in Invoice capture. In addition, the line details aren't shown in the side-by-side viewer. This will create a pending vendor invoice.
Cost invoice – Invoices of this type contain non-stock items. Those items can be either service items or procurement category items. This can create either a pending vendor invoice or go straight to an invoice journal.
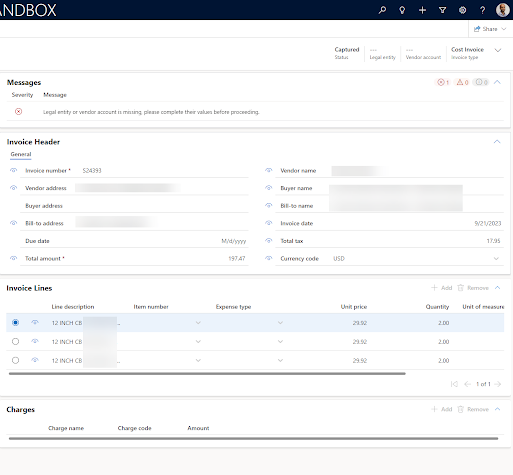
After you address the errors (mapping) and mandatory fields that need to be filled in. you can transfer to FinOps. The only one that can be routed to an invoice journal is the Cost invoice. Otherwise, all go through the pending vendor invoice path.

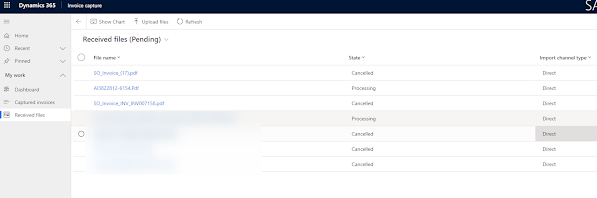
Upload files
Manual
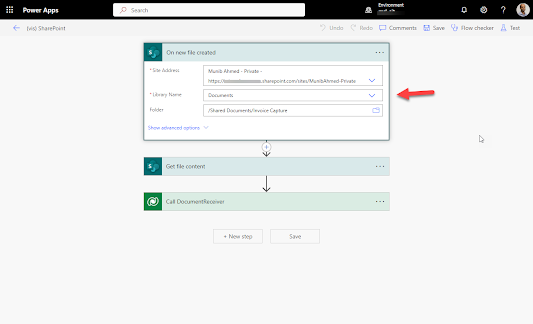
You can upload files manually or use one of the managed flows. eg. SharePoint.
The status will go from Processing and will be set to Cancelled after it is recognised.
SharePoint
Enter the SharePoint site url and for the library/folder, just enter something to progress (it doesnt need to be a valid path just yet). It can be corrected by doing a look up in flow.
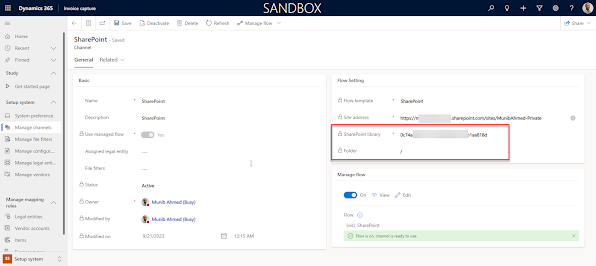
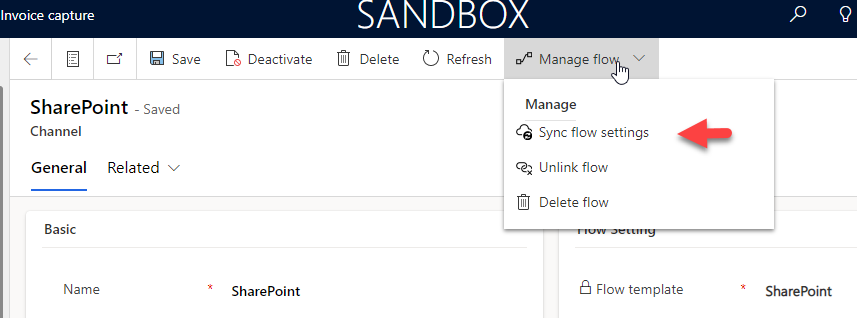
Once you have saved it, go back to the channels page to sync it. This will refresh the setup screen to reflect what you changed in flow.
Other notes
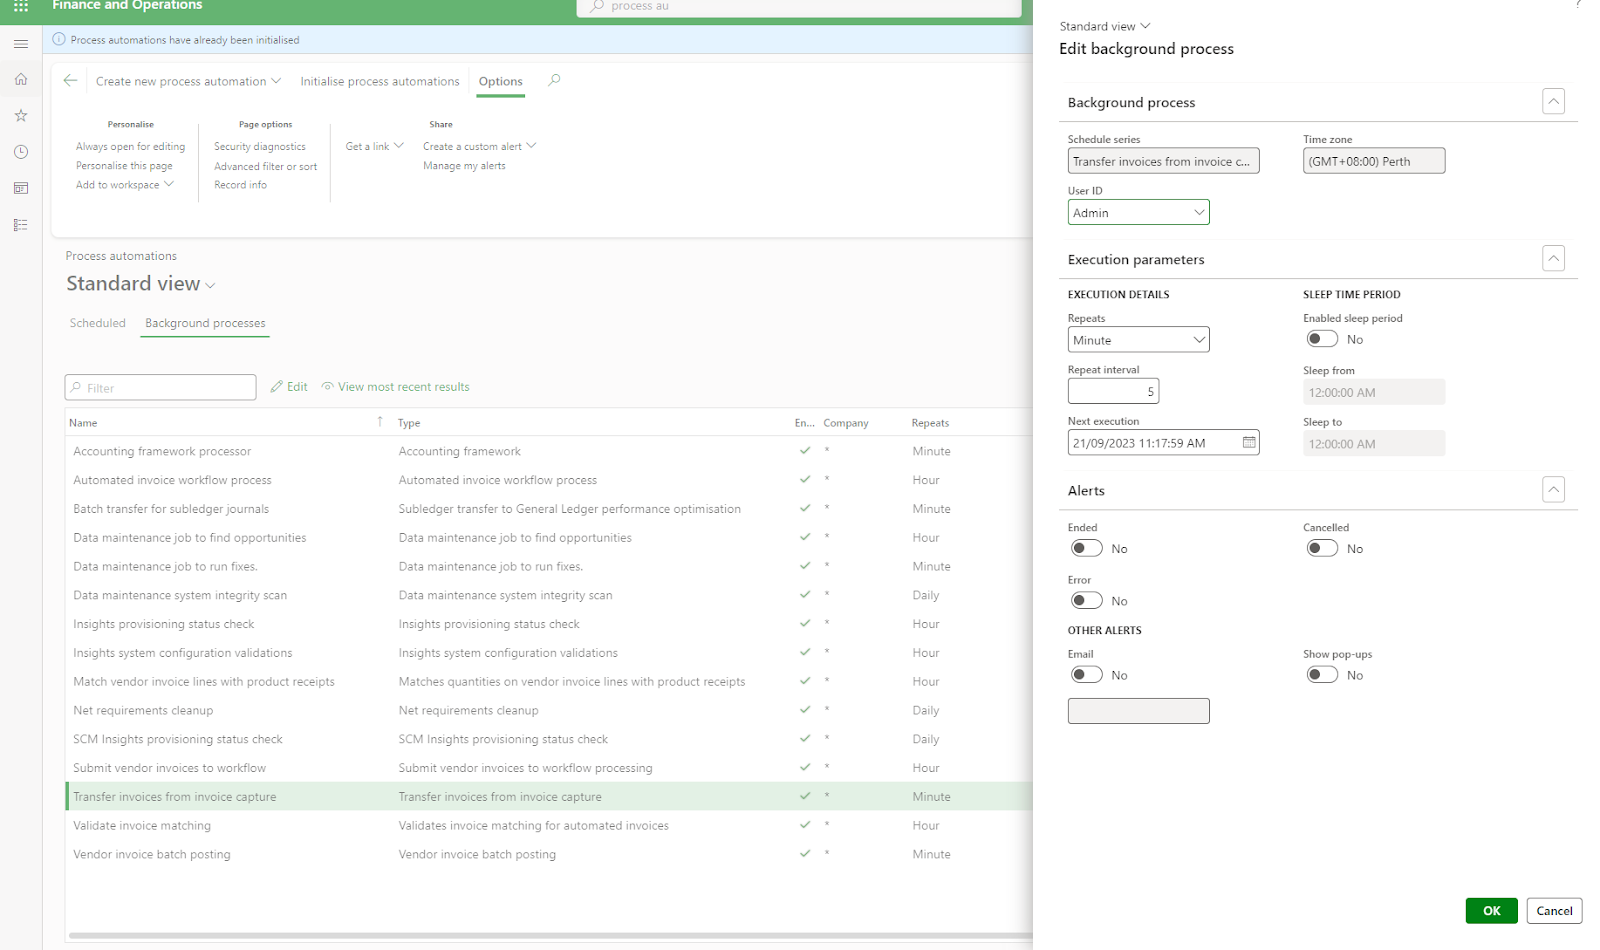
Touch less transfer - fully automated
In this scenario, you can have the full automation from new file, to recognition to transfer to FinOps. This is done in 5 minute intervals by default. Under the process automation form, you can edit the time or check on any issues. Otherwise, they will appear in awaiting status.
Date time and local formats
For non CE/Power Platforms people, this might be one of the first things you fix in your environment. Under the system settings and personal settings, you can select a local format.
Known Limitation:
Vendor synchronisation is currently manual and planned for future roadmap item. For now, you have to click sync every time you create a new vendor.
Found Limitation:
If you choose to go down the invoice journal path, note that it picks the first journal name with type vendor tax invoice recording.

I had to dig into the code to find why I couldn't find any configuration.
